PowerApps or as the new name for it is, Canvas driven Apps, is a very fast low/no-code way of creating applications that can fill in the blanks where Dynamics 365 CE sometimes fit. Can for instance be when there is a mapping entity, a complex calendar functionality or even integrations with a camera or other applications directly. These things can be done, some are even supported within the new UI/UCI if you are running it through the tablet/mobile client. However, there is currently no easy way that I have found to just add a PowerApp/Canvas Drive App (I will just call it PowerApp below to make things easier) to Dynamics. But after a chat with my friend, ex MVP and now Microsoft Global Black Belt Carsten Groth (isn’t that a cool name for a team by the way?) he told me that it is possible to embed PowerApps. So I googled a bit a found that no one seemed to have blogged about this (if you have, please tell me in the comments) except for other it concerning other applications like SharePoint. I tried it out and found that it wasn’t that hard at all to embedd a PowerApp into Dynamics 365.
The first thing we have to start with is to create our PowerApp. You can get to this place by browsing to https://web.powerapps.com or clicking the waffle in Office365 and then selecting PowerApps. In my case, I used the Dynamics 365 template and pointed to the Case Entity and did more or less pressed Next-next-finnish. I did replace the field that was shown in the first screen from the Guid of the case to the field “title” as that makes a little bit more sense looking at.
So what I was looking for when creating the PowerApp was the AppId, in this case: “904e3ac1-1e26-4b4b-a384-971485f6709c“
What we then need is the embedding syntax for PowerApps which is: <iframe src=”https://web.powerapps.com/webplayer/iframeapp?source=iframe&screenColor=rgba(104,101,171,1)&appId=/providers/Microsoft.PowerApps/apps/[AppId]” />
You need to replace the [AppId] with your AppId. Also, if you do not specify it, the iframe it will typically render rather small so I would recommend either setting the size of it directly with width and height attributes or using css, the latter being more kosher.
I tried setting an Iframe directly with this in Dynamics 365, but that didn’t seem to work. All I got was a spinner like this:
Spinner which never stops when tried to add PowerApp directly
Not sure why this is.
So, I circumvented it and created a very small html-page like this:
This time, when trying the TestPowerApp.html-page from my local drive, the spinner was quickly replaced by this and then by the App
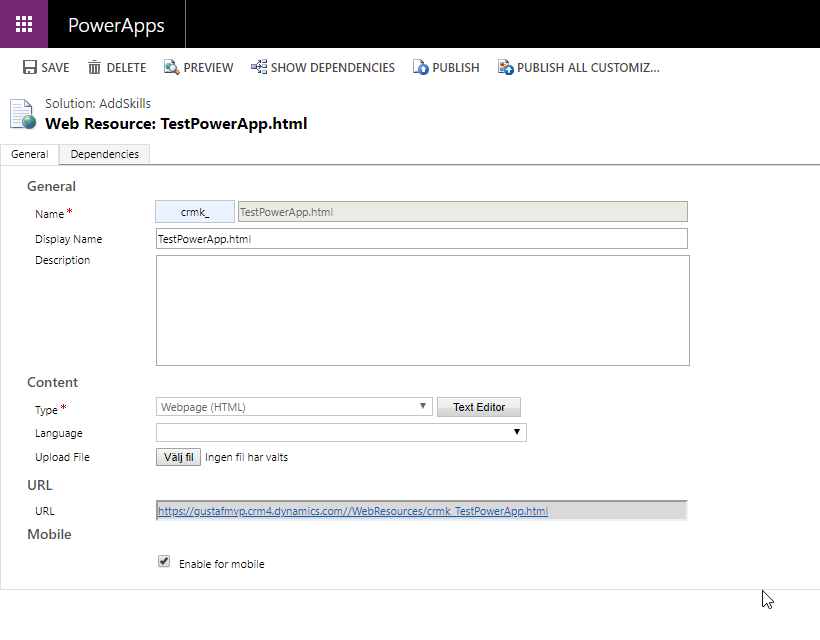
Then I uploaded this file as a webresource to Dynamics.
Create a webresource with the simple html-page pointing to the PowerApp
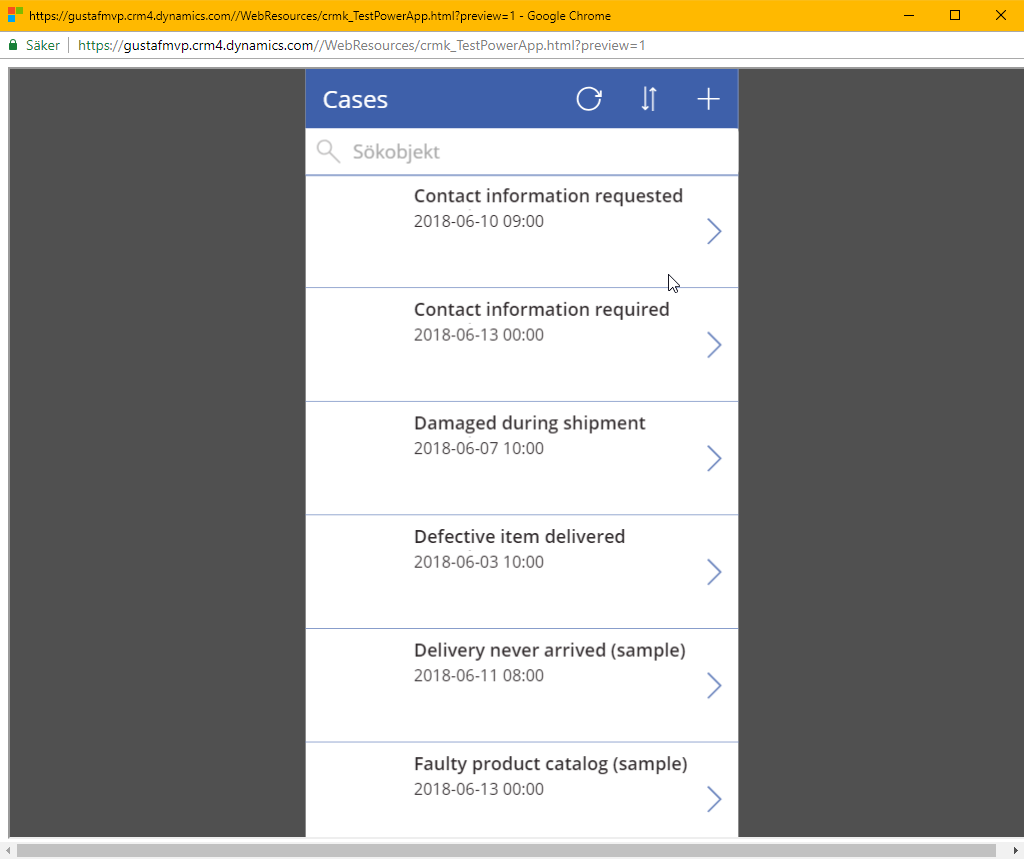
After uploading it, in the WebResource screen, you can test the page by clicking on the URL. It should show a webpage with the PowerApp.
The PowerApp running as a webresource in Dynamicws 365
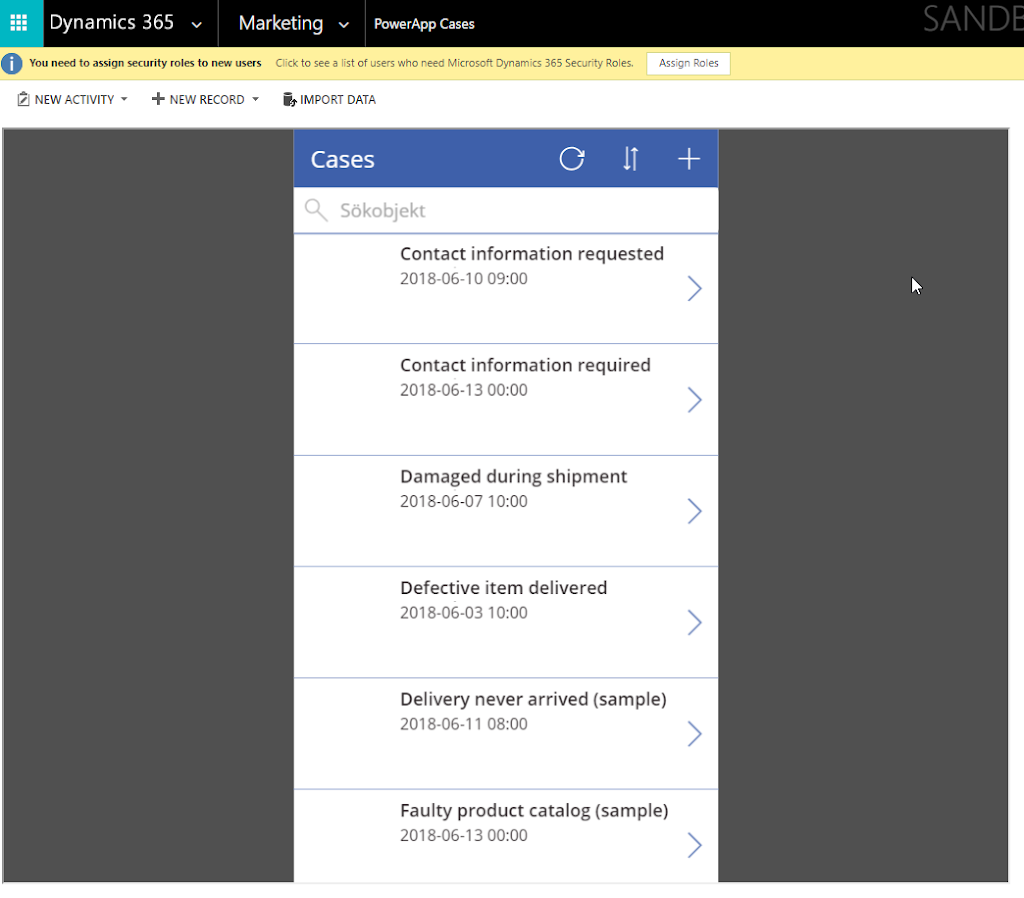
Now you can use this web resource wherever you want. Like directly in a sitemap:
Added PowerApp webresource to the Marketing Area as a Subarea called “Power App Cases”
It should be possible to send parameters to the PowerApp as well making them context aware so that we can create PowerApps that for instance show up within a case and show specific data on that case after you have selected it in Dynamics 365. However, if you look at the iframe syntax you will see that the AppId and stuff is already a parameter and I need to research this a bit more to be able to figure it out. I think that the html web resource probably has to shuffle the query string parameters from Dynamics to PowerApps. I will leave this hanging and hope that someone else in the community catches this ball! Otherwise I will try to figure it out later.
As CDS (common data service) and Modular Driven Apps are the same thing as Dynamics 365, just with less sugar on top, this technique can be used there as well.
If you find anything unclear or have any questions, please leave a comment (moderated).
Gustaf Westerlund MVP, Founder and Principal Consultant at CRM-konsulterna AB www.crmkonsulterna.se
Setting up Dynamics 365 Data Export Service requires a Azure KeyVault to be set up which is typically done using a PowerShell script which can be found in the Data Export Service setup wizard. However, if you run into issues setting this up, it might be easier to do this directly in Azure by minimizing the steps of the scripts. This was a tip that my friend and Business Solution MVP Scott Durow recommended. He mentions this in his very instructive video, but doesn’t actually show how, so I thought I’d just detail how I made it work.
First some background. The reason why I even started investigating how to do this manually was that when I tried running the PowerShell script supplied by Microsoft in the wizard.
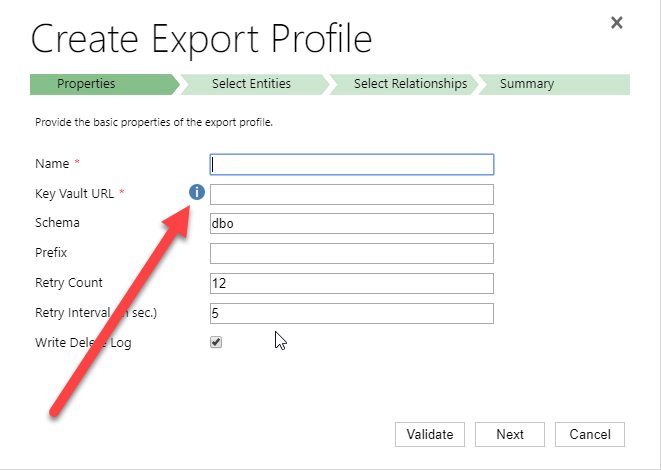
Press the “i” icon to get a window containing the PowerShell Script that Microsoft recommends for setting up the Key Vault.
When running the PowerShell script both as myself (not a global admin) and asking a global admin to do it, it failed in the latter parts. The key vault was created by some of the access policies seemed to be missing and it just didn’t work. My users rights in Azure was Contributor in the Resource Group, and it was a bit interesting cause the global admin and I got different error messages, but when I finally managed to create the key vault manually, I could do it all with my user, so it didn’t seem I was missing any rights to do it.
First step is to make sure you have all your data straight. The power shell script is good for this. Check out Scott clip if you want to know how to find the different strings. He shows it very clearly.
The highlighted parts have to be replaced by your settings. I will use these variables to have something to reference to further in this article.
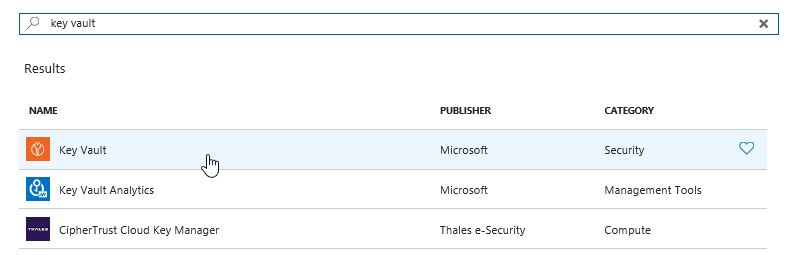
Search for Key Vault and add the “Key vault”, the top one in this picture
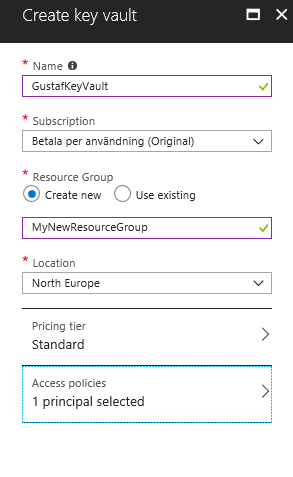
Then we have to set it up. Not so tricky if you have worked with Azure before. Consider if you want to work in an existing Resourcegroup or if you want to create a new one. Typically you need to have Azure SQL services running as well so it might be good to keep them all together to be able to see the costs and control who has access why a resource group might be a good idea. But that should hence already exist. If not, you can create it. I would recommend keeping Azure SQL and Key vault in the same, not sure if it actually works in different resource groups, probably does, but I haven’t tested.
Creating the key vault – in this case I am creating a new resource group, normally it would already exist
Azure will add you as the default principal with access to the key vault. We will add Data Export Service to this later. For now, just create it.
Now we need to open the Key vault and select the “Secrets” section in the menu on the left hand side and press the button:
“+ Generate/Import”
Then you have to enter you Secret name ($secretName) and the connection string ($connectionString) into the value.
Creating a secret – $secretname in Name and $connectionstring in Value
Press “Create”.
You should now return to the previous screen and see a row for your secret. Select it.
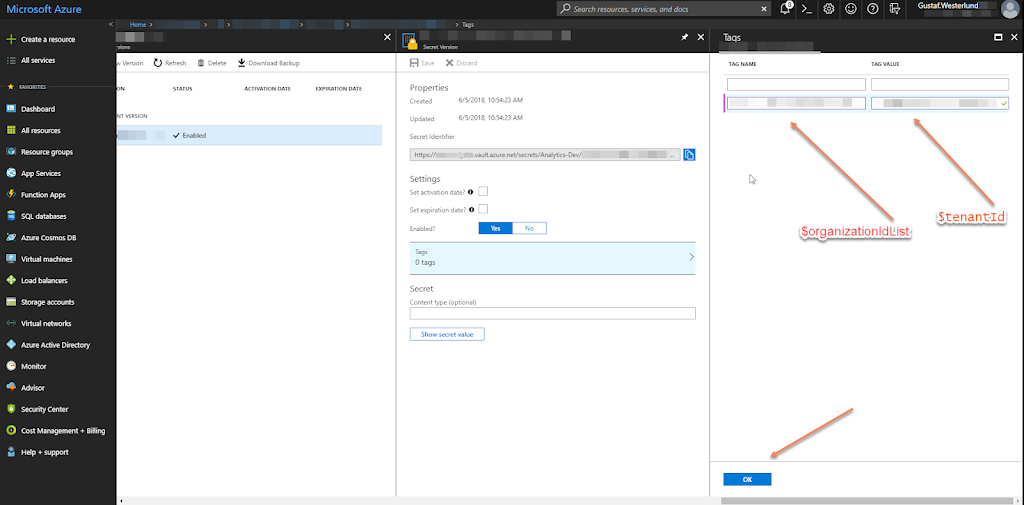
It should open the settings panel for the Secret, press the “Tags” part which is located in the middle and add a tag which has $OrgIdList ($organizationIdList) as the key and Tennant ($tenantId) as value. I have blurred them out below as they are rather private.
Adding a tag with OrgIdList and tenantId to a Secret
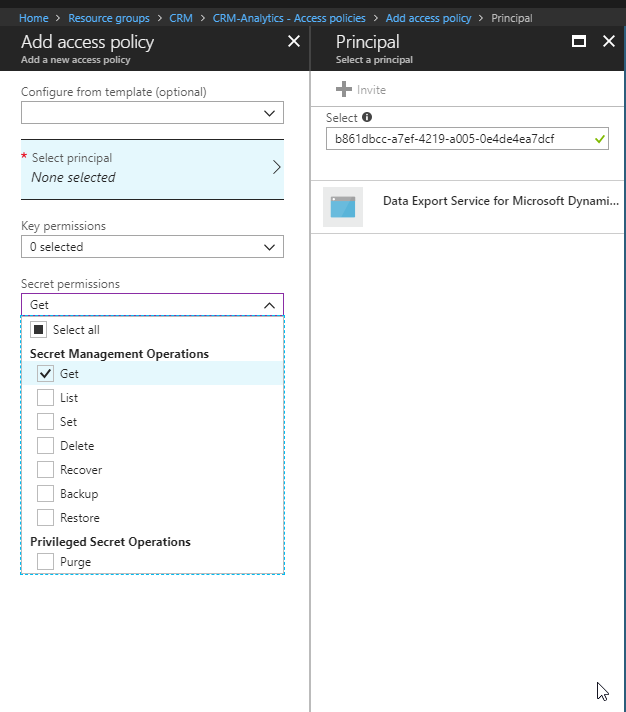
You then need to go back to the Key Vault and click on the “Access Policies” menu item, you should then see yourself as the principal as this was set when we created the key vault. We now need to add Data Export Service as a valid Principal with read access rights.
So click “Add”, click “Select Principal” and search for “b861dbcc-a7ef-4219-a005-0e4de4ea7dcf” which is the ID for Data Export Service. It should show up like this:
It needs to have “Secret Management Operations – GET” permissions and nothing else.
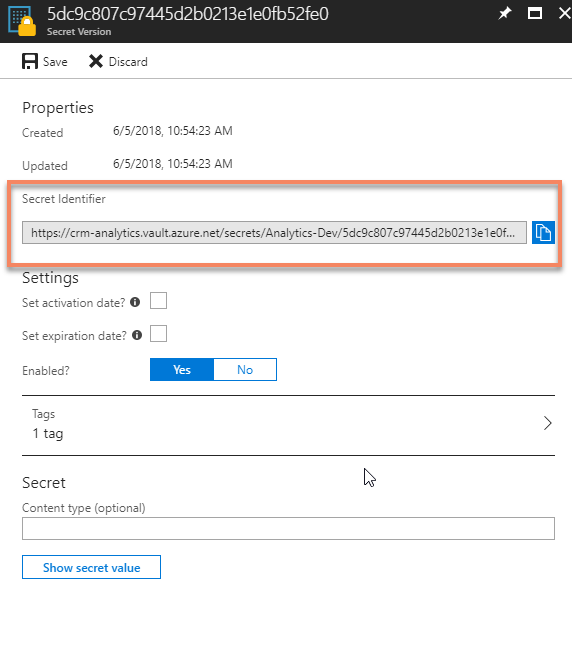
Now, go back to the Secret and copy the URI to the Secret.
Getting the URI for the Key Vault Secret
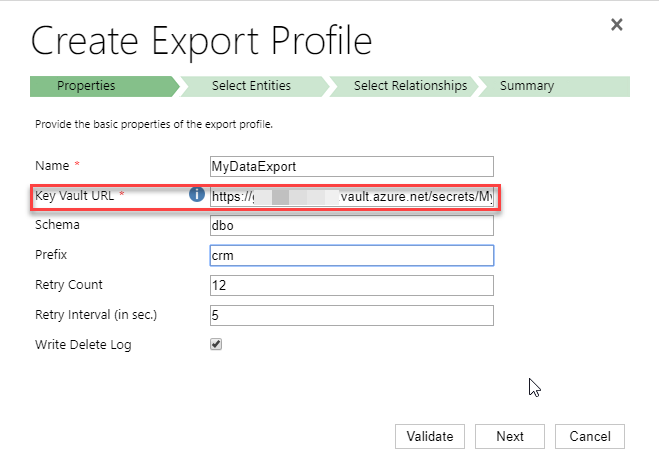
Paste it into the Data Export Service Wizard field for Key Vault.
Fill in the other information and press validate. Hopefully it will work out well!
Some issues
Being too cheap with the Azure SQL level If you don’t go for a Azure SQL P1 and choose a lower tier, you might get this warning:
We tried an S0 for our Dev environment and tried to sync a couple of million records and that just didn’t work, we got tons of errors. We upgraded the ASQL to S2 and then at least we didn’t get any errors. We are planning for P1s in UAT and production.
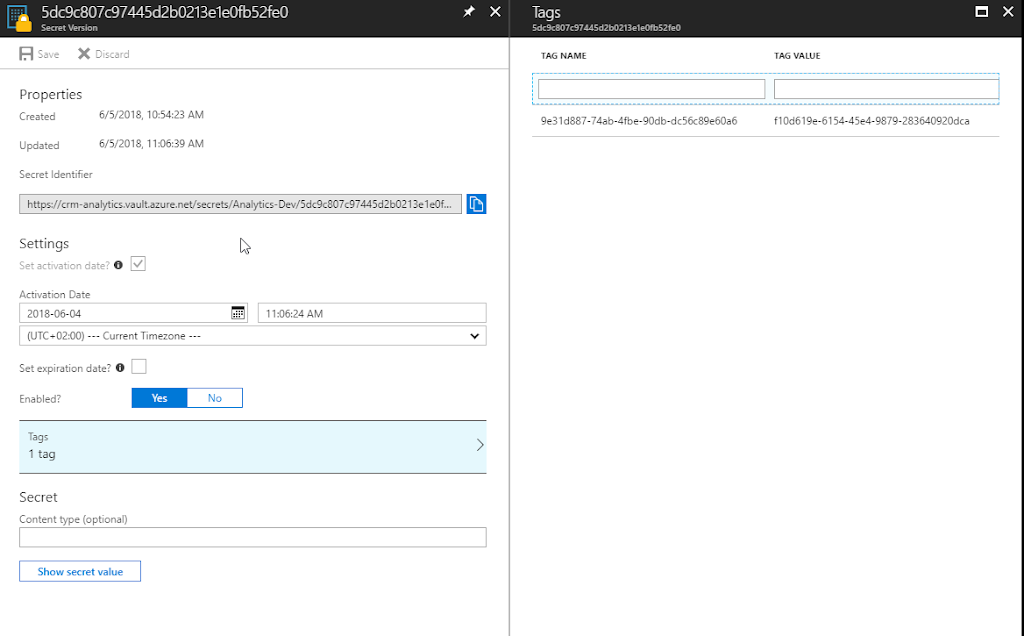
Might have to set activation date on secret Seems that you might have to set an activation date on the secret. Not sure why this is, the PS-script doesn’t seem to do this. But not very hard.
Added activation date on the Secret from June 4.th
Using Database schema that is not created The default database schema is “dbo” in the Data Export Service Wizard. If you change this to something else like “crm” and you haven’t created this in the database, you will get an error. It is simple to fix, you just have to go into the database and create the schema. To create the schema “crm” open a query and run: CREATE SCHEMA crm


Recent Comments